At this year’s Vegas Shoot in February one of my dear friends Rod Menzer walked up to me and told me he had to show me something I would really get excited about.
Donnie Thacker, A guy I shot within Vegas the year before, had made a prototype device that measures how much flex there is in a steel bar. Based on the amount of flex it could then light up a green or a red light. By only showing me this simple setup he was able to get my IT mind fired up. Mount this to a bow and you have a next-generation archery analytics tool. This could be a game changer, the next step for archery.

The Vegas Shoot
Donnie and Jesse Broadwater had been shooting the device in Vegas and after the first day I met up with Donny and asked him how his first day went. He said he was shooting well but for some reason he was grouping very well on the top target, but on the two bottom targets his groups where significantly bigger. So the normal explanation is situations like these are: “I guess I was a little bit more nervous” or “The shots where just not feeling great” or some other vague explanation as we archers usually give. But Donny’s explanation was based on the data he gathered during the round: “I uploaded all my shot data to my smartphone yesterday evening and noticed that the shots I made on the top target are shot more strongly than the two on the bottom targets. So today I’m going to make stronger shots on the bottom targets.” And so he did, the second day he shot a 300 with a higher X-count then the day before. At that moment I thought these guys are on to something, instead of going with a feel, you can actually measure what you are doing and make decisions based on facts.
The Device
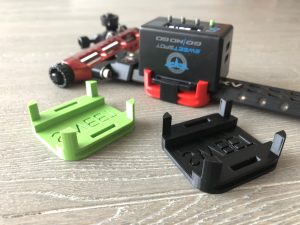
So months passed until I received my own Sweetspot Pro to play with, and man was I excited to get this thing running. So let’s first breakout the two versions there are, and what the difference is between the two.
| Sweetspot GO/NOGO | Sweetspot PRO |
| LCD screen | LCD screen |
| Green and Red light for pressure indication | Green and Red light for pressure indication |
| Adjustable pressure threshold | Adjustable pressure threshold |
| 500 shot memory | 500 shot memory |
| Sight light with 16 brightness levels. | Sight light with 16 brightness levels. |
| Water resistant | Water resistant |
| Shot counter | Shot counter |
| Rechargeable battery | Rechargeable battery |
| Built in WIFI | |
| Shot Timer | |
| Pressure graph with live view on a mobile device | |
| Save shots to your laptop or mobile device |
My device of choice was the “Pro” version because of the extra functionality, mainly the option to connect to it via wifi, The graphical view of the shots and the option to export this data to your personal device and save it for later use. Mine actually says “GO/NOGO” on the package as this was an early shipment and they were out of “PRO” cases.
The package

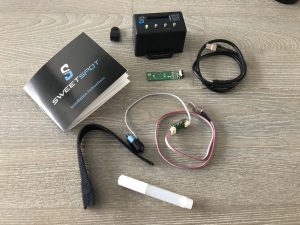
Both the “GO/NOGO” and the “PRO” come in the same package with the same accessories.
- The Sweetspot Pro or GO/NOGO
- Pressure sensor
- Micro-USB sensor connection cable
- Micro USB Pressure light kit
- Sight light kit
- Glue
- Tie-wraps and Velcro
- Instruction manual ( READ THIS! )
One time setup
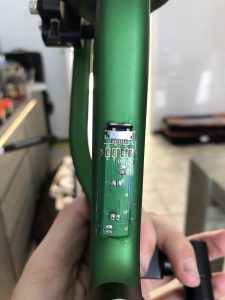
The Sensor
The Sweetspot requires you to bond the pressure sensor to your riser. Only when it is perfectly glued against your riser will it read accurately every time you draw back your bow.
So sticking the sensor on is the most important part of setting the SweetSpot up. You can, if you wish, remove the sensor from your bow without damaging the anodize, the glue won’t damage your riser. However, take note that the sensor is not usable anymore when you remove it. Here’s how I did it:
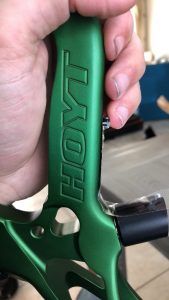
- Find a flat spot on the bow, since I’m shooting a Hoyt Prevail 40, the best spot to stick the sensor on is on the front of the grip. (Make sure you put the sensor somewhere between your front stabilizer mount and sight mount. Any higher or lower on the bow will not give accurate readings.)
- Making sure the riser is clean, I used 96% alcohol. Do not use acetone or such as that will damage your paint or anodize.
- Take a piece of clear scotch tape to position the sensor on the bow. (do not apply glue to the sensor yet!)
- Now that you have found the location where you will glue the sensor on your bow apply a big dot of glue to each of the 4 sensor pads and some on the green board just above it to make sure it stays connected to your bow whenever you plug in the USB-cable.
- When you have carefully positioned the sensor, use electrical tape to secure it in place and let it cure for at least an hour.
- After you have let it cure for at least an hour you can take all the tape off.
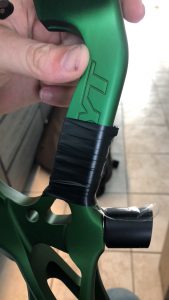
- After this, I have wrapped my grip with thin hockey tape to prevent the sensor from getting damaged during normal use.
- The first-time charge, I used my Samsung charger to charge it to 100%, make sure you fully charge it, it will drain the battery rather fast when you don’t give it a full charge before first use.
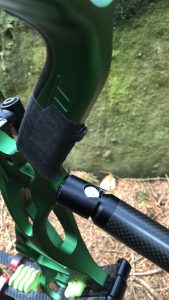
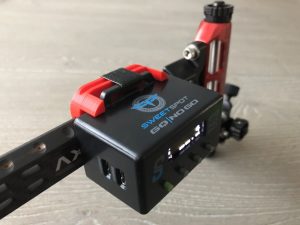
Attaching the SweetSpot
The next step is to attach the SweetSpot to your bow, it has a Velcro band in the package that you can use to attach it to either your riser or your sight. The case is just a little wider than the extension rod on most sights so make sure to strap it tight so it won’t move when you shoot. For my Axcel Achieve sight, I have 3D printed a little bracket for Axcel and shibuyas (you can order them here: sanderdolderman.nl) so it will not slide on the bar. The last thing you want to do is connecting the USB cable from the sensor to the SweetSpot. At this point, I have not installed the GO/NOGO light nor the fiber light kit. The upcoming week I will only use it to analyze my shots, for the pro series and 3D nationals I will use it with the GO/NOGO and fiber light.
Get one of these brackets at sanderdolderman.nl
Shooting
So when everything has been set up and installed it’s time to head to the range and see what we can with this SweetSpot. When you turn it on for the first time it wants you to calibrate it for the first use. it’s important to hold your bow in a neutral position without an arrow or bowstand attached to it. Hit the select button to let it calibrate (takes about 2 seconds, insert photo holding bow, hit calibrate). (If you have been playing with the device before and you want to start the setup sequence again, turn the device off, press and hold the up and down buttons and turn it on again. Hold the up and down button’s till you see the calibrate message on the display.) The display now gives you the “Shoot” signal, so fired a shot. So now that I have set it up I’m ready to use the device. Let’s take a look at the menu first to see what options we have. You can press the up or down button to enter the menu and I’ll be scrolling down to skip through the menu.
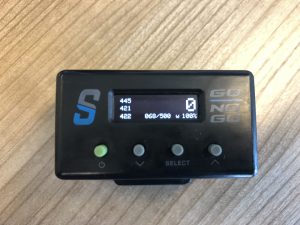
The homescreen shows you the “high value”, “last shot value”, “optimum value”, “number of arrows shot/in memory”, “W for WIFI state”, “Battery level” and the “current pressure value”.

Fig 1. Software version number
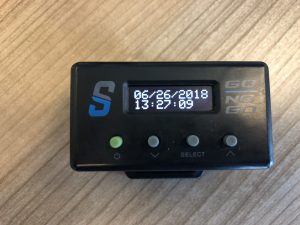
Fig. 2 Date and time, if no or an incorrect time is displayed, connect it to a device trough wifi and it will pick up the correct date and time.
Fig 3. WIFI password (you cannot change this)
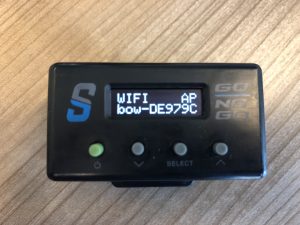
Fig 4. WIFI SSID name (You cannot change this), you can turn it off, or put it in “BowJunky” mode, in this mode you make your sweetspot available for tournament organizers to read out the data during an event or final you are attending.
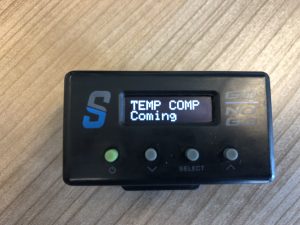
Fig. 5 A function not yet available
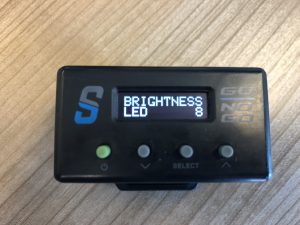
Fig. 6 Led brightness adjustment, these are the green and red light that advice you on your shooting. Hit select and up and down to adjust
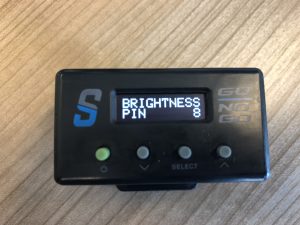
Fig. 7 Pin brightness adjustment.

Fig. 8 Shot timer adjustment, hit select and with up and down you can adjust the it takes for the Red light to come on.
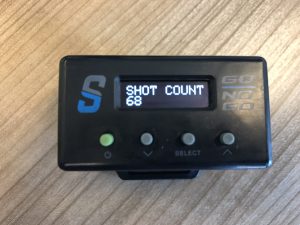
Fig. 9: Shot counter that counts all shots.
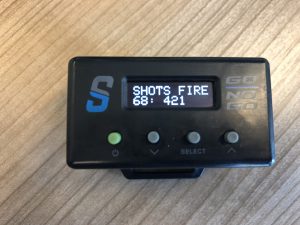
Fig 10: Shots fired at what value. Hit select and with up and down you can browse through all the shots you made and at what value they were released.
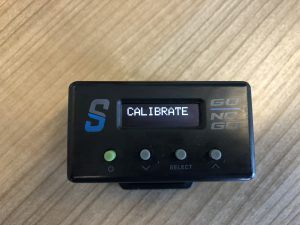
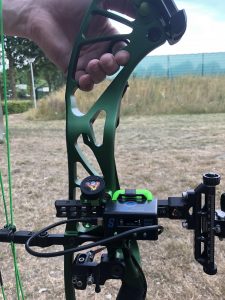
Fig 11: Calibrate option to zero your device, the best way to calibrate is to hold your bow close to level by holding it off the ground and pointing it to the target, the value should be close to 0. The sensor is very sensitive so don’t be surprised if it changes when you hold it in a different way, nock an arrow or putting it in the bow stand.
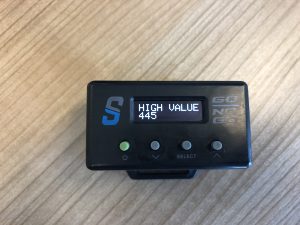
Fig 12: Your high value, if you pull harder into the bow and exceed this value, the light will go of. If you stay in between your high and optimal value the light will stay green.

Fig 13: Your optimum value is the lowest value in which you can still break a perfect shot, if you are about to go under the green lights starts blinking. If you are under this value, the red light will turn on.
Analyzer mode
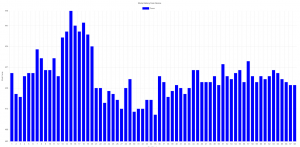
So now I started shooting and I have set it up as to what I call it “Analyzer mode”. I have attached the sensor and the SweetSpot but I have not attached the shot indicators yet. I Just want to see what the bow and I do while shooting and how the shots are being registered. So I have shot somewhat close to 75 shots now and I hooked my laptop connected my laptop wireless to the SweetSpot to see how it registered my shots. When I connect to the WIFI and open up a browser and go to www.sweetspotbow.com or 10.0.0.1 to open the menu. There is a live view that can be used by coaches to monitor your shot during training or competition, you can adjust settings and you can see a 500 shot history.
Here you can see an overview of all the shots sorted by date and time that I shot during this test. Since this was the first time I have played a lot with bow setup, grip positions, and recalibrated it a few times you see a lot of difference between the first 35 and the last 33 shots.
Breaking down the shot.
- Start of the draw cycle;
- Peak weight reached;
- Anchor release and building up a little pressure;
- Building up a little pressure to get the hinge release to “click”;
- Relax release hand and try to keep the pressure even;
- The shot breaks.
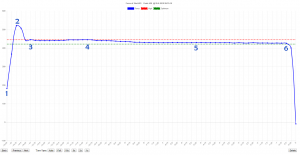
This shot I made you are seeing plotted above was a good and strong shot that also hit the middle. A typical good shot for me takes about 15 seconds from start to finish. With the help of the go/no-go LED indicators to tell you when you are either pulling hard, creeping up or taking too long to shoot the shot and “advice” you during the shot to make it or not.
In short
The SweetSpot for me is an awesome tool to monitor your shot, see what equipment changes can do to how your bow responds, see if something on your bow is moving, advice you when to shoot or when you can better let down but most of all you can measure how you bow feels. The most important thing is gluing the sensor to your riser, I can imagine you don’t want to glue anything to your bow, however, I glued a sensor on and took it off after a while and it did not damage or leave any marks on my anodized riser. Last but not least, you cannot use the device during World Archery events as electronic devices are not allowed, you can, however, use it for ASA/IBO, NFAA, IFAA, Kings of Archery and in practice. And for me only using it in practice would make it worth buying.
More info about the device can be found on www.sweetspotarchery.com or on facebook.com/sweetspotarchery.